Introduction
warning
The Berkeleytime Documentation is currently under construction.
Welcome to the Berkeleytime Docs! This is the primary documentation source for developers.
Getting Started
Developing and Building Locally
There are two options: with and without containerization (ie. Docker).
With Containerization (Recommended)
Using Docker allows us to build the docs without downloading dependencies on our host machine, greatly simplifying the build process.
# ./berkeleytime
# Ensure you are on the latest commit
git pull

# Build the container (only needed once every time docs/Dockerfile changes!)
docker build --target=docs-dev --tag="docs:dev" ./docs

# Run the container
docker run --publish 3000:3000 --volume ./docs:/docs "docs:dev"
The docs should be available at http://localhost:3000/ with live reload. To kill the container, you can use the Docker Desktop UI or run docker kill [container id]. You can find the container ID from docker ps.
tip
To change the port from the above 3000, modify the docker run command as follows, replacing the XXXX with your desired port:
docker run --publish XXXX:3000 --volume ./docs:/docs "docs:dev"
Without Containerization
To build and view the docs locally, mdBook must be installed by following the guide here. It is necessary to install Rust locally as there are dependencies that are installed with cargo. Thus, it is highly recommended to build mdbook from Rust.
# Install mdbook preprocessors with cargo
cargo install mdbook-alerts
cargo install mdbook-toc

# ./berkeleytime
# Ensure you are on the latest commit
git pull

# Navigate into the docs directory
cd docs

# Build the book and serve at http://localhost:3000/
mdbook serve --port=3000 --open
Changes in the markdown files will be shown live.
Creating Books with Markdown and mdBook
As these docs are primarily written with markdown, feel free to check this quick guide on markdown's syntax.
To add new pages to the docs, check out the mdBook guide. Below is a step-by-step guide on creating a new page:
-
Create a new
.mdfile in thesrcdirectory. For example, if you want your new page to be in the Infrastructure section, you should put the new file insrc/infrastructure. -
Add this file to
SUMMARY.md. The indentation indicates which section your file will go under. For example:- [Infrastructure](./infrastructure/README.md) - [My New File's Title](./infrastructure/my-new-file.md) -
Add content to your file and see the results!
Local Development
Starting up the Application
Local development has a few local dependencies:
- Node.js
- Docker Desktop
- pre-commit
Next:
# ./berkeleytime

# Continue installation of dependencies.
pre-commit install
Currently, the main development occurs on the gql branch. Please make sure you are on this branch!
# ./berkeleytime
git switch gql

# Create .env from template file
cp .env.template .env

# Setup local code editor intellisense.
npm install
npx turbo run generate

# Ensure Docker Desktop is running. Start up application
docker compose up -d
Common Commands
Upon changing any GraphQL typedefs, the generated types must be regenerated:
# ./berkeleytime
npx turbo run generate
Seeding Local Database
A seeded database is required for some pages on the frontend.
# ./berkeleytime

# Ensure the MongoDB instance is already running.
docker compose up -d

# Download the data
curl -O https://storage.googleapis.com/berkeleytime/public/stage_backup.gz

# Copy the data and restore
docker cp ./stage_backup.gz berkeleytime-mongodb-1:/tmp/stage_backup.gz
docker exec berkeleytime-mongodb-1 mongorestore --drop --gzip --archive=/tmp/stage_backup.gz
Deployment with CI/CD
The deployment process is different for development, staging, and production environments.
- Development: Best for short-term deployments to simulate a production environment as closely as possible. Useful for deploying feature branches before merging into
master. - Staging: The last "testing" environment to catch bugs before reaching production. Reserved for the latest commit on
master. - Production: User facing website! Changes being pushed to production should be thoroughly tested on a developer's local machine and in development and staging environments.
Development
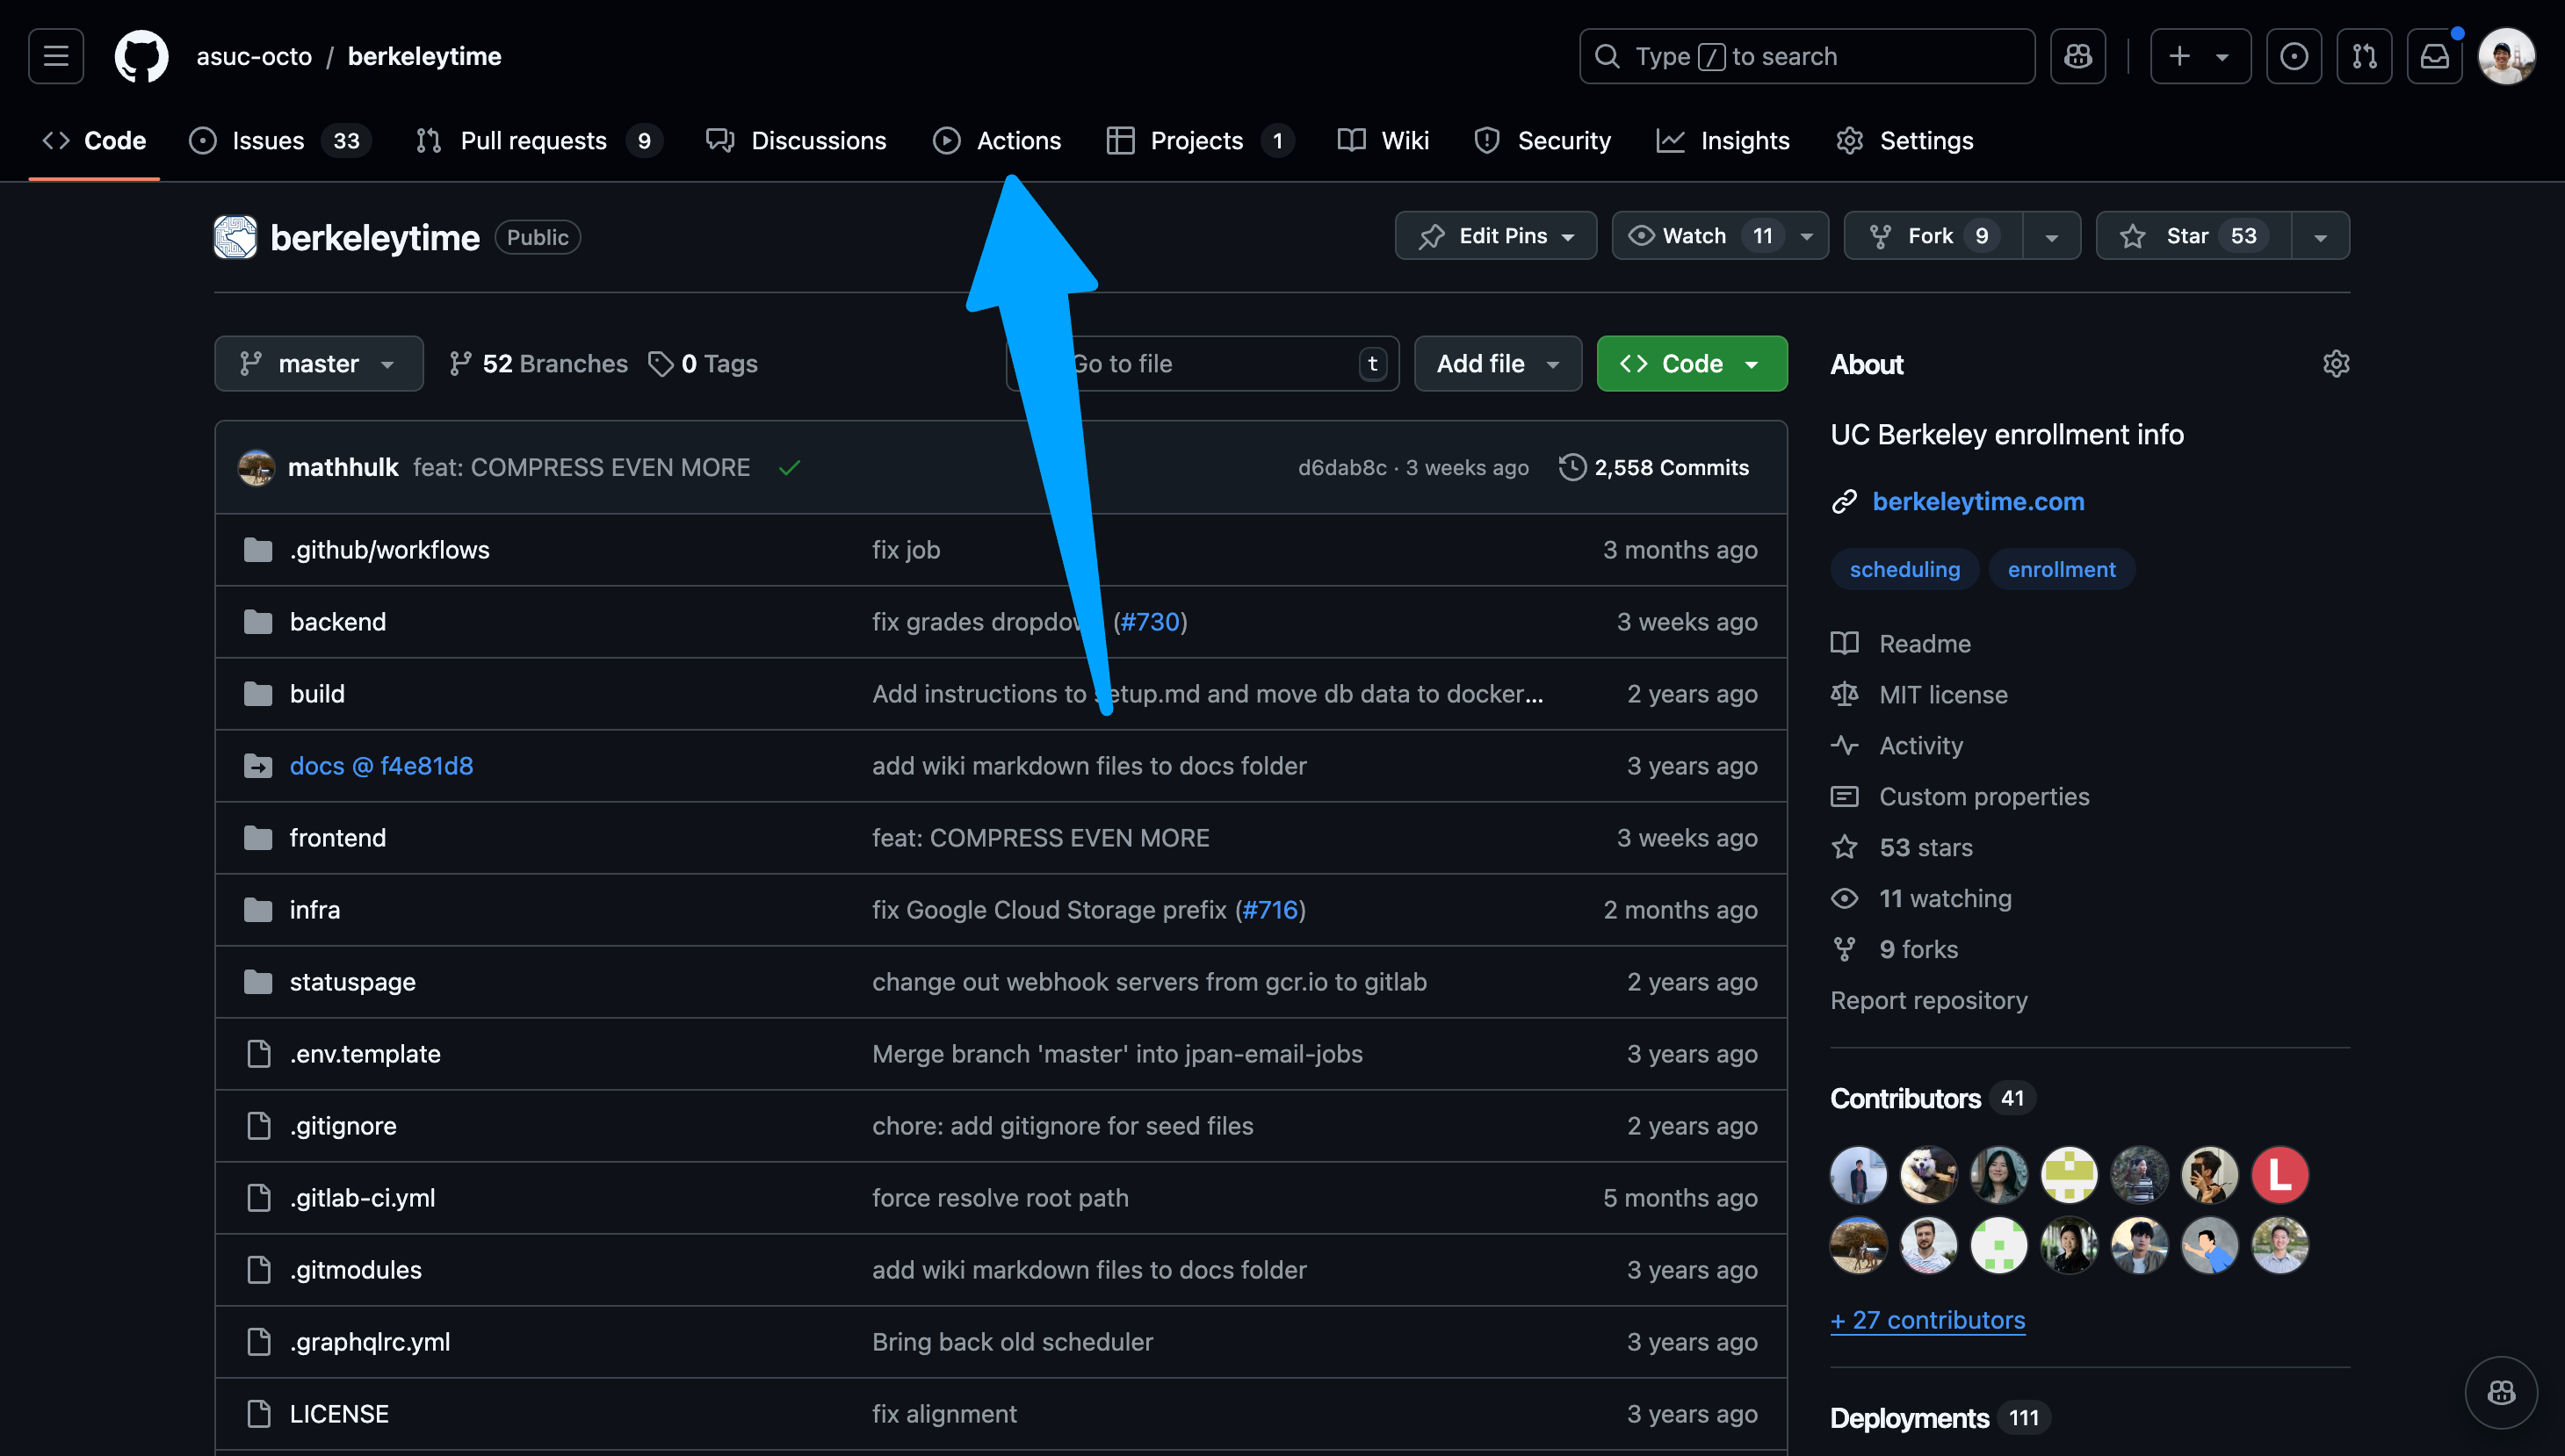
-
Go to the actions page.
Image
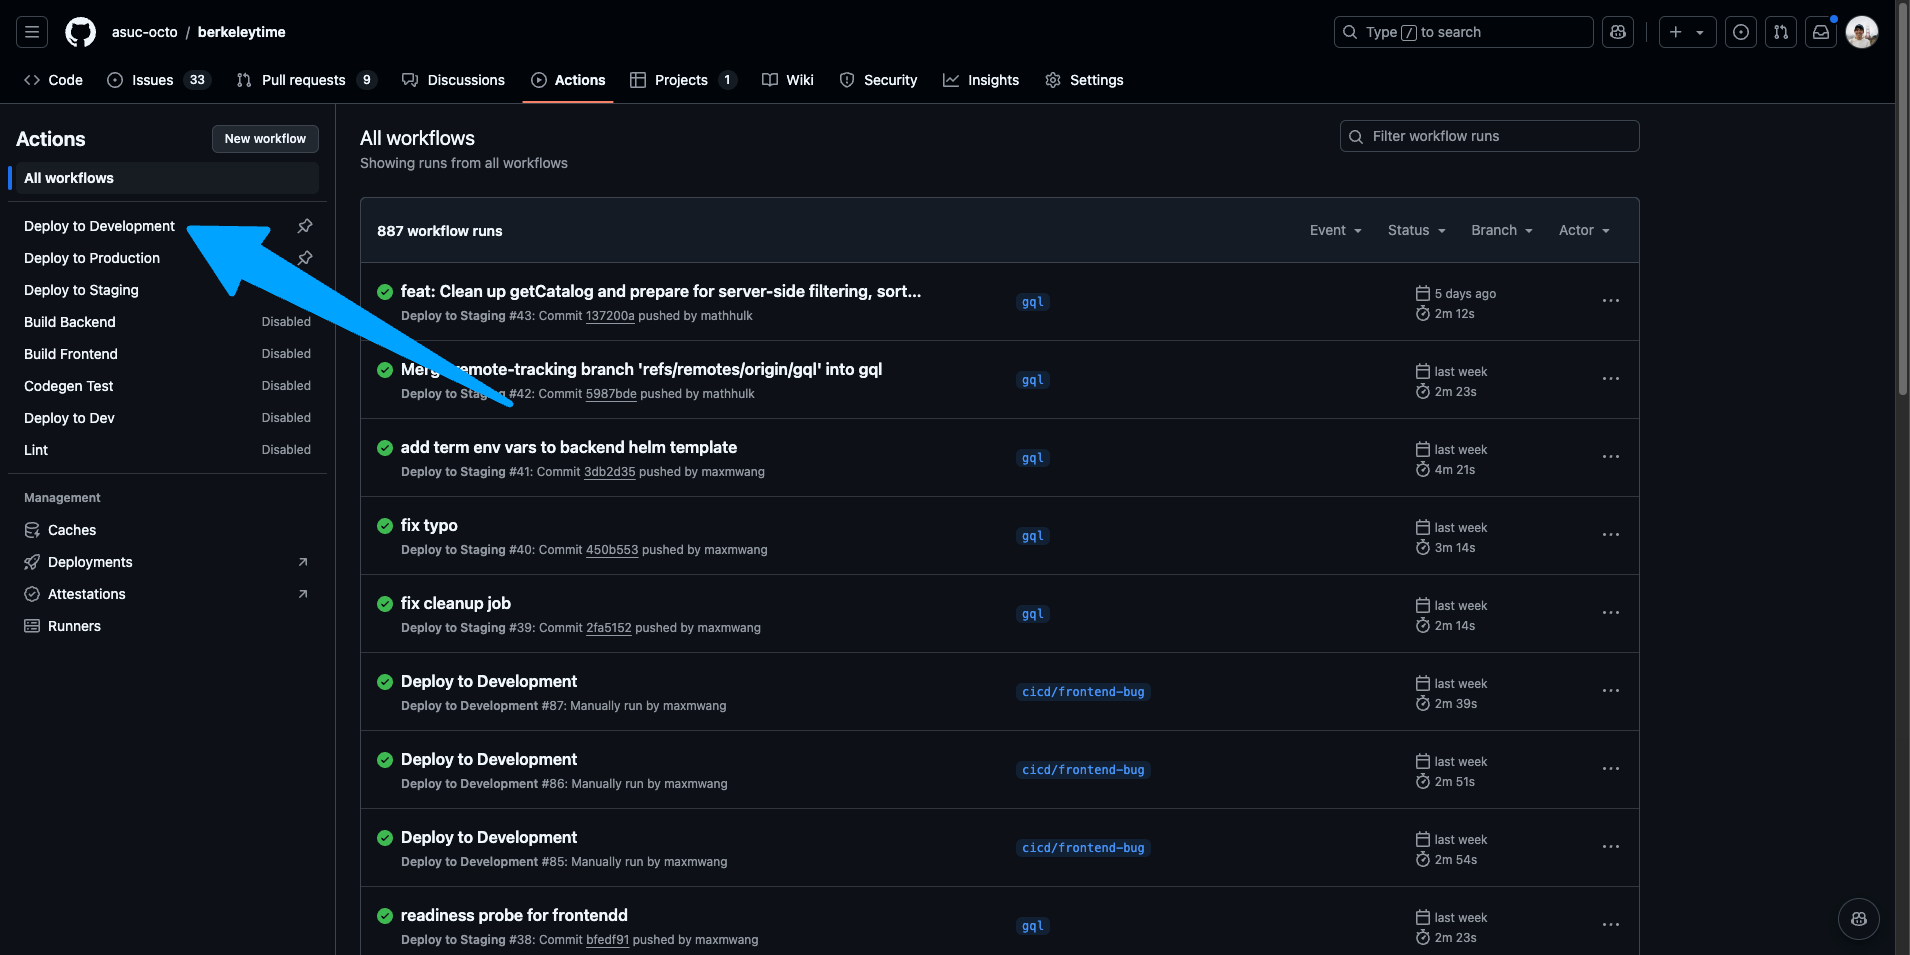
-
Ensure "Deploy to Development" is the selected action on the left sidebar.
Image
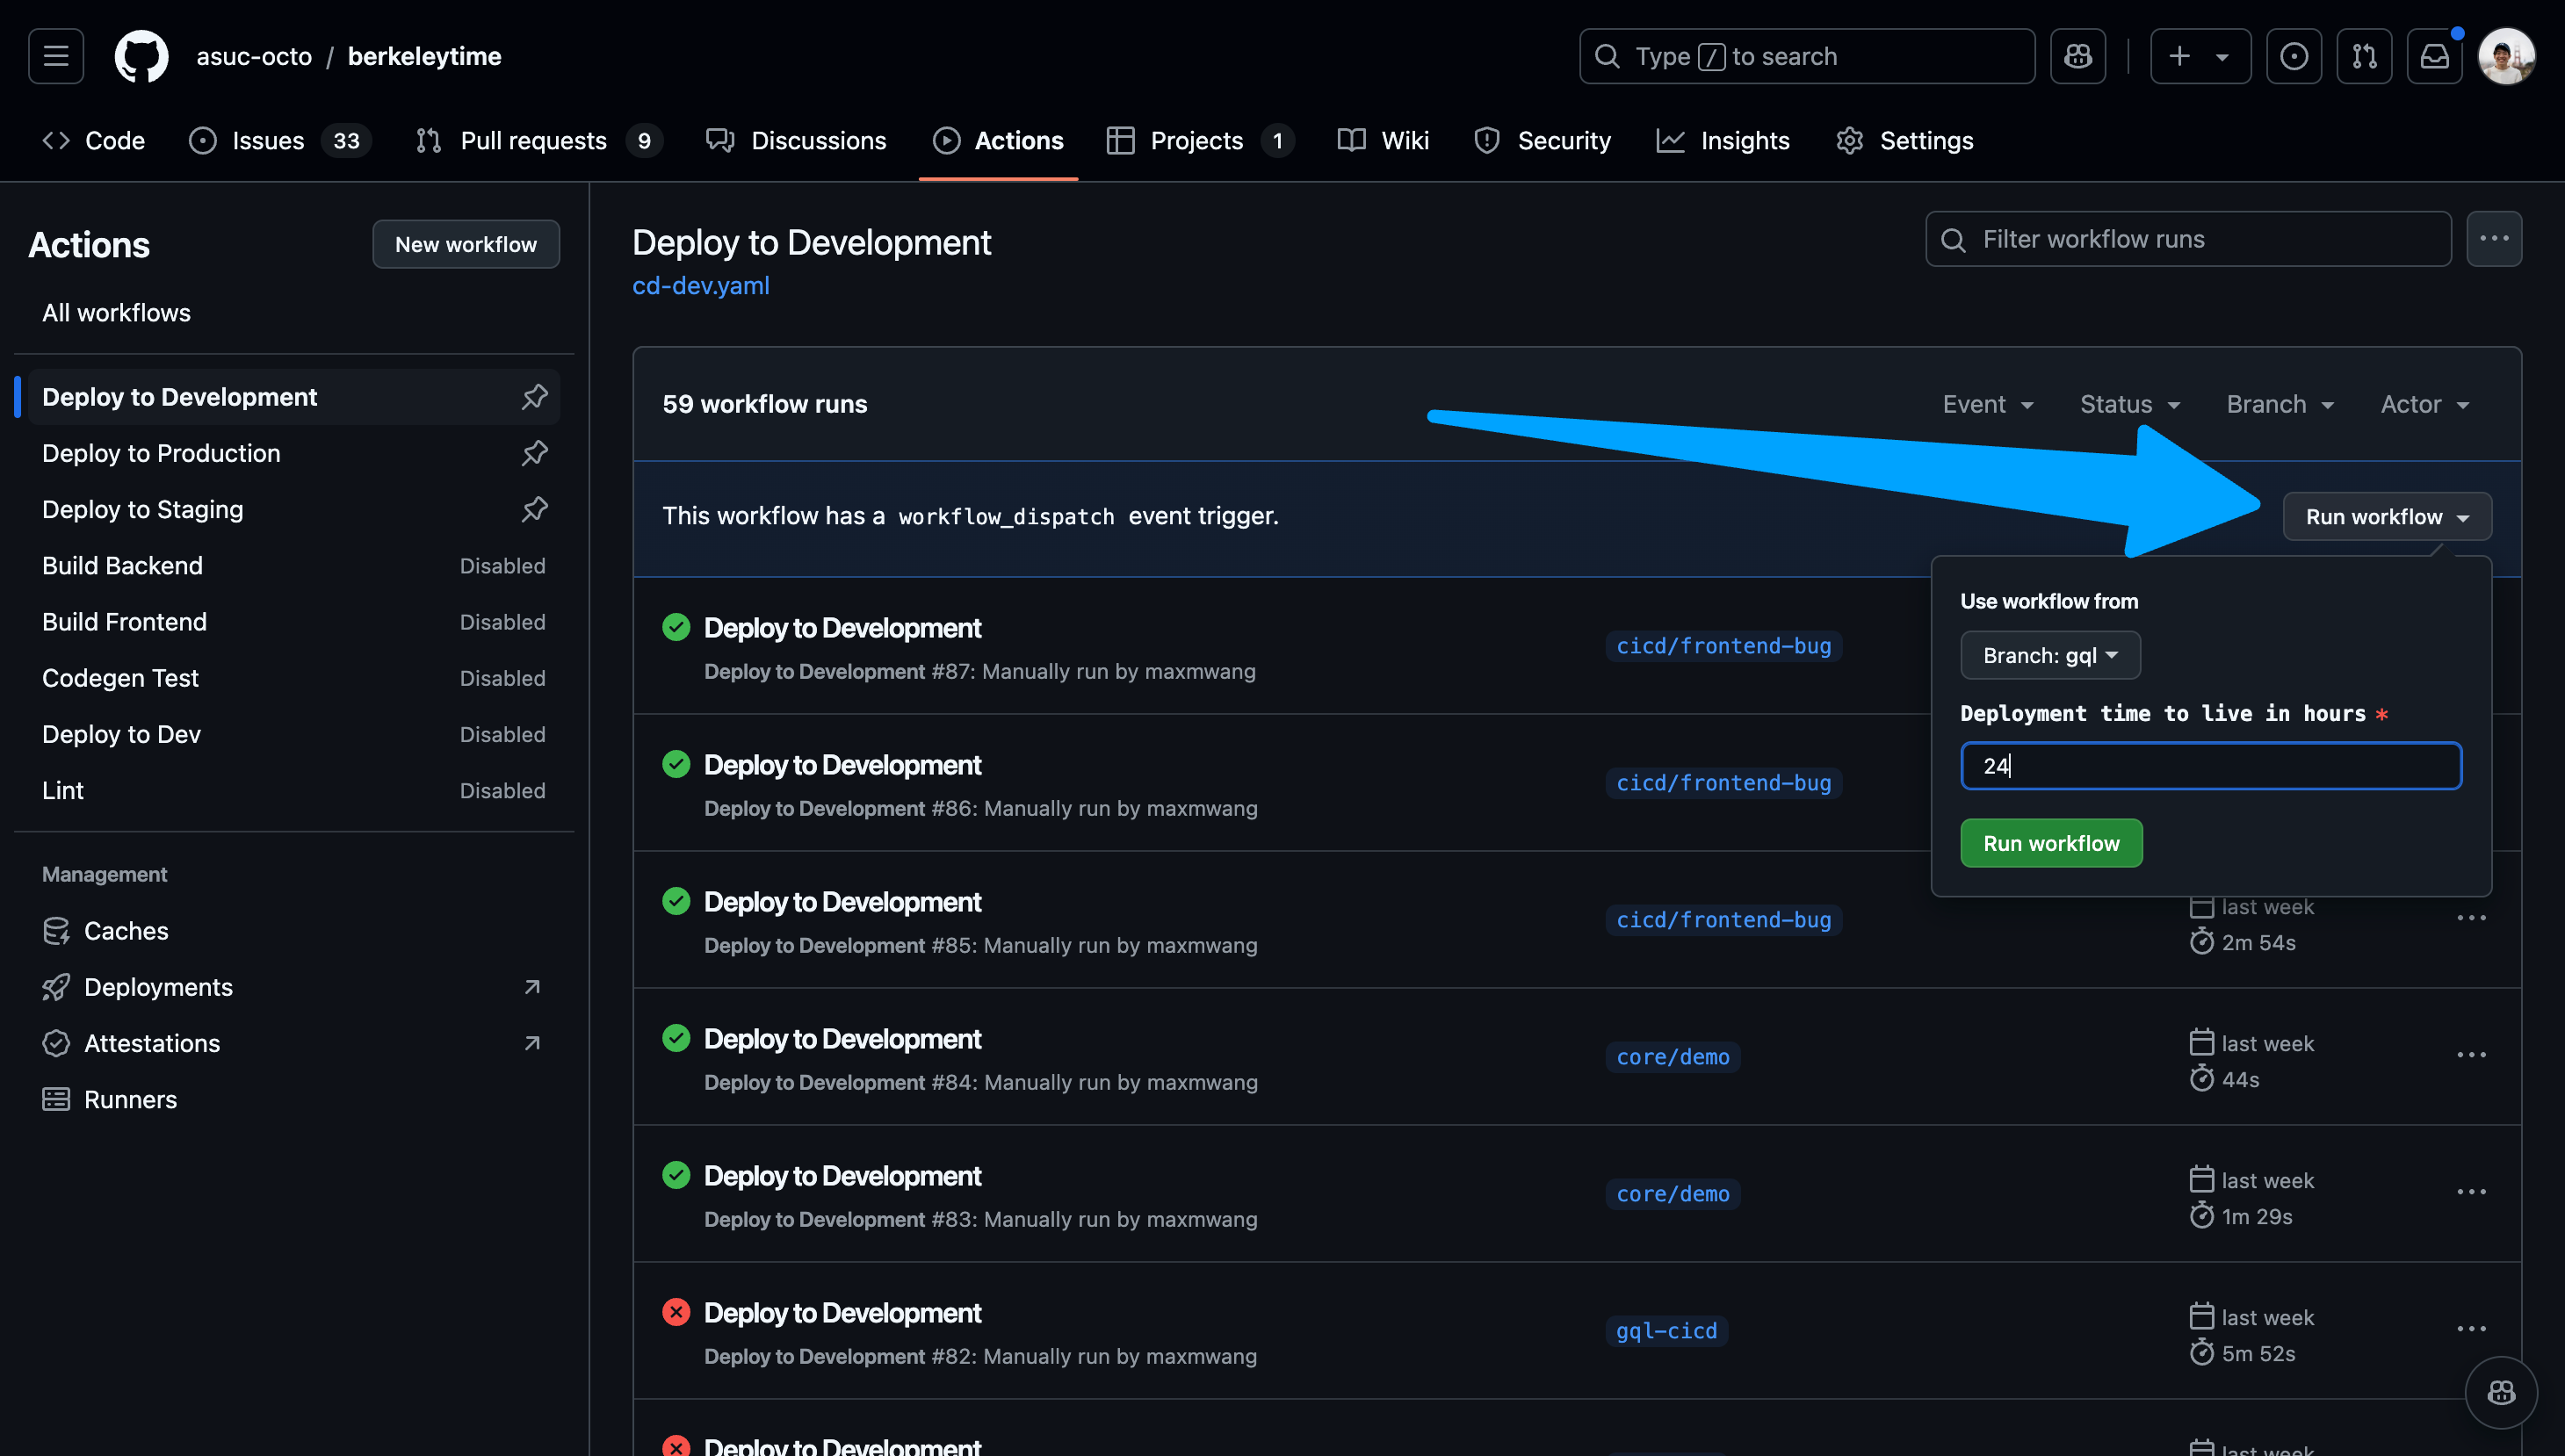
-
Navigate to the "Run workflow" dropdown on the right. Select your branch and input a time to live in hours. Please keep this value a reasonable number.
Image
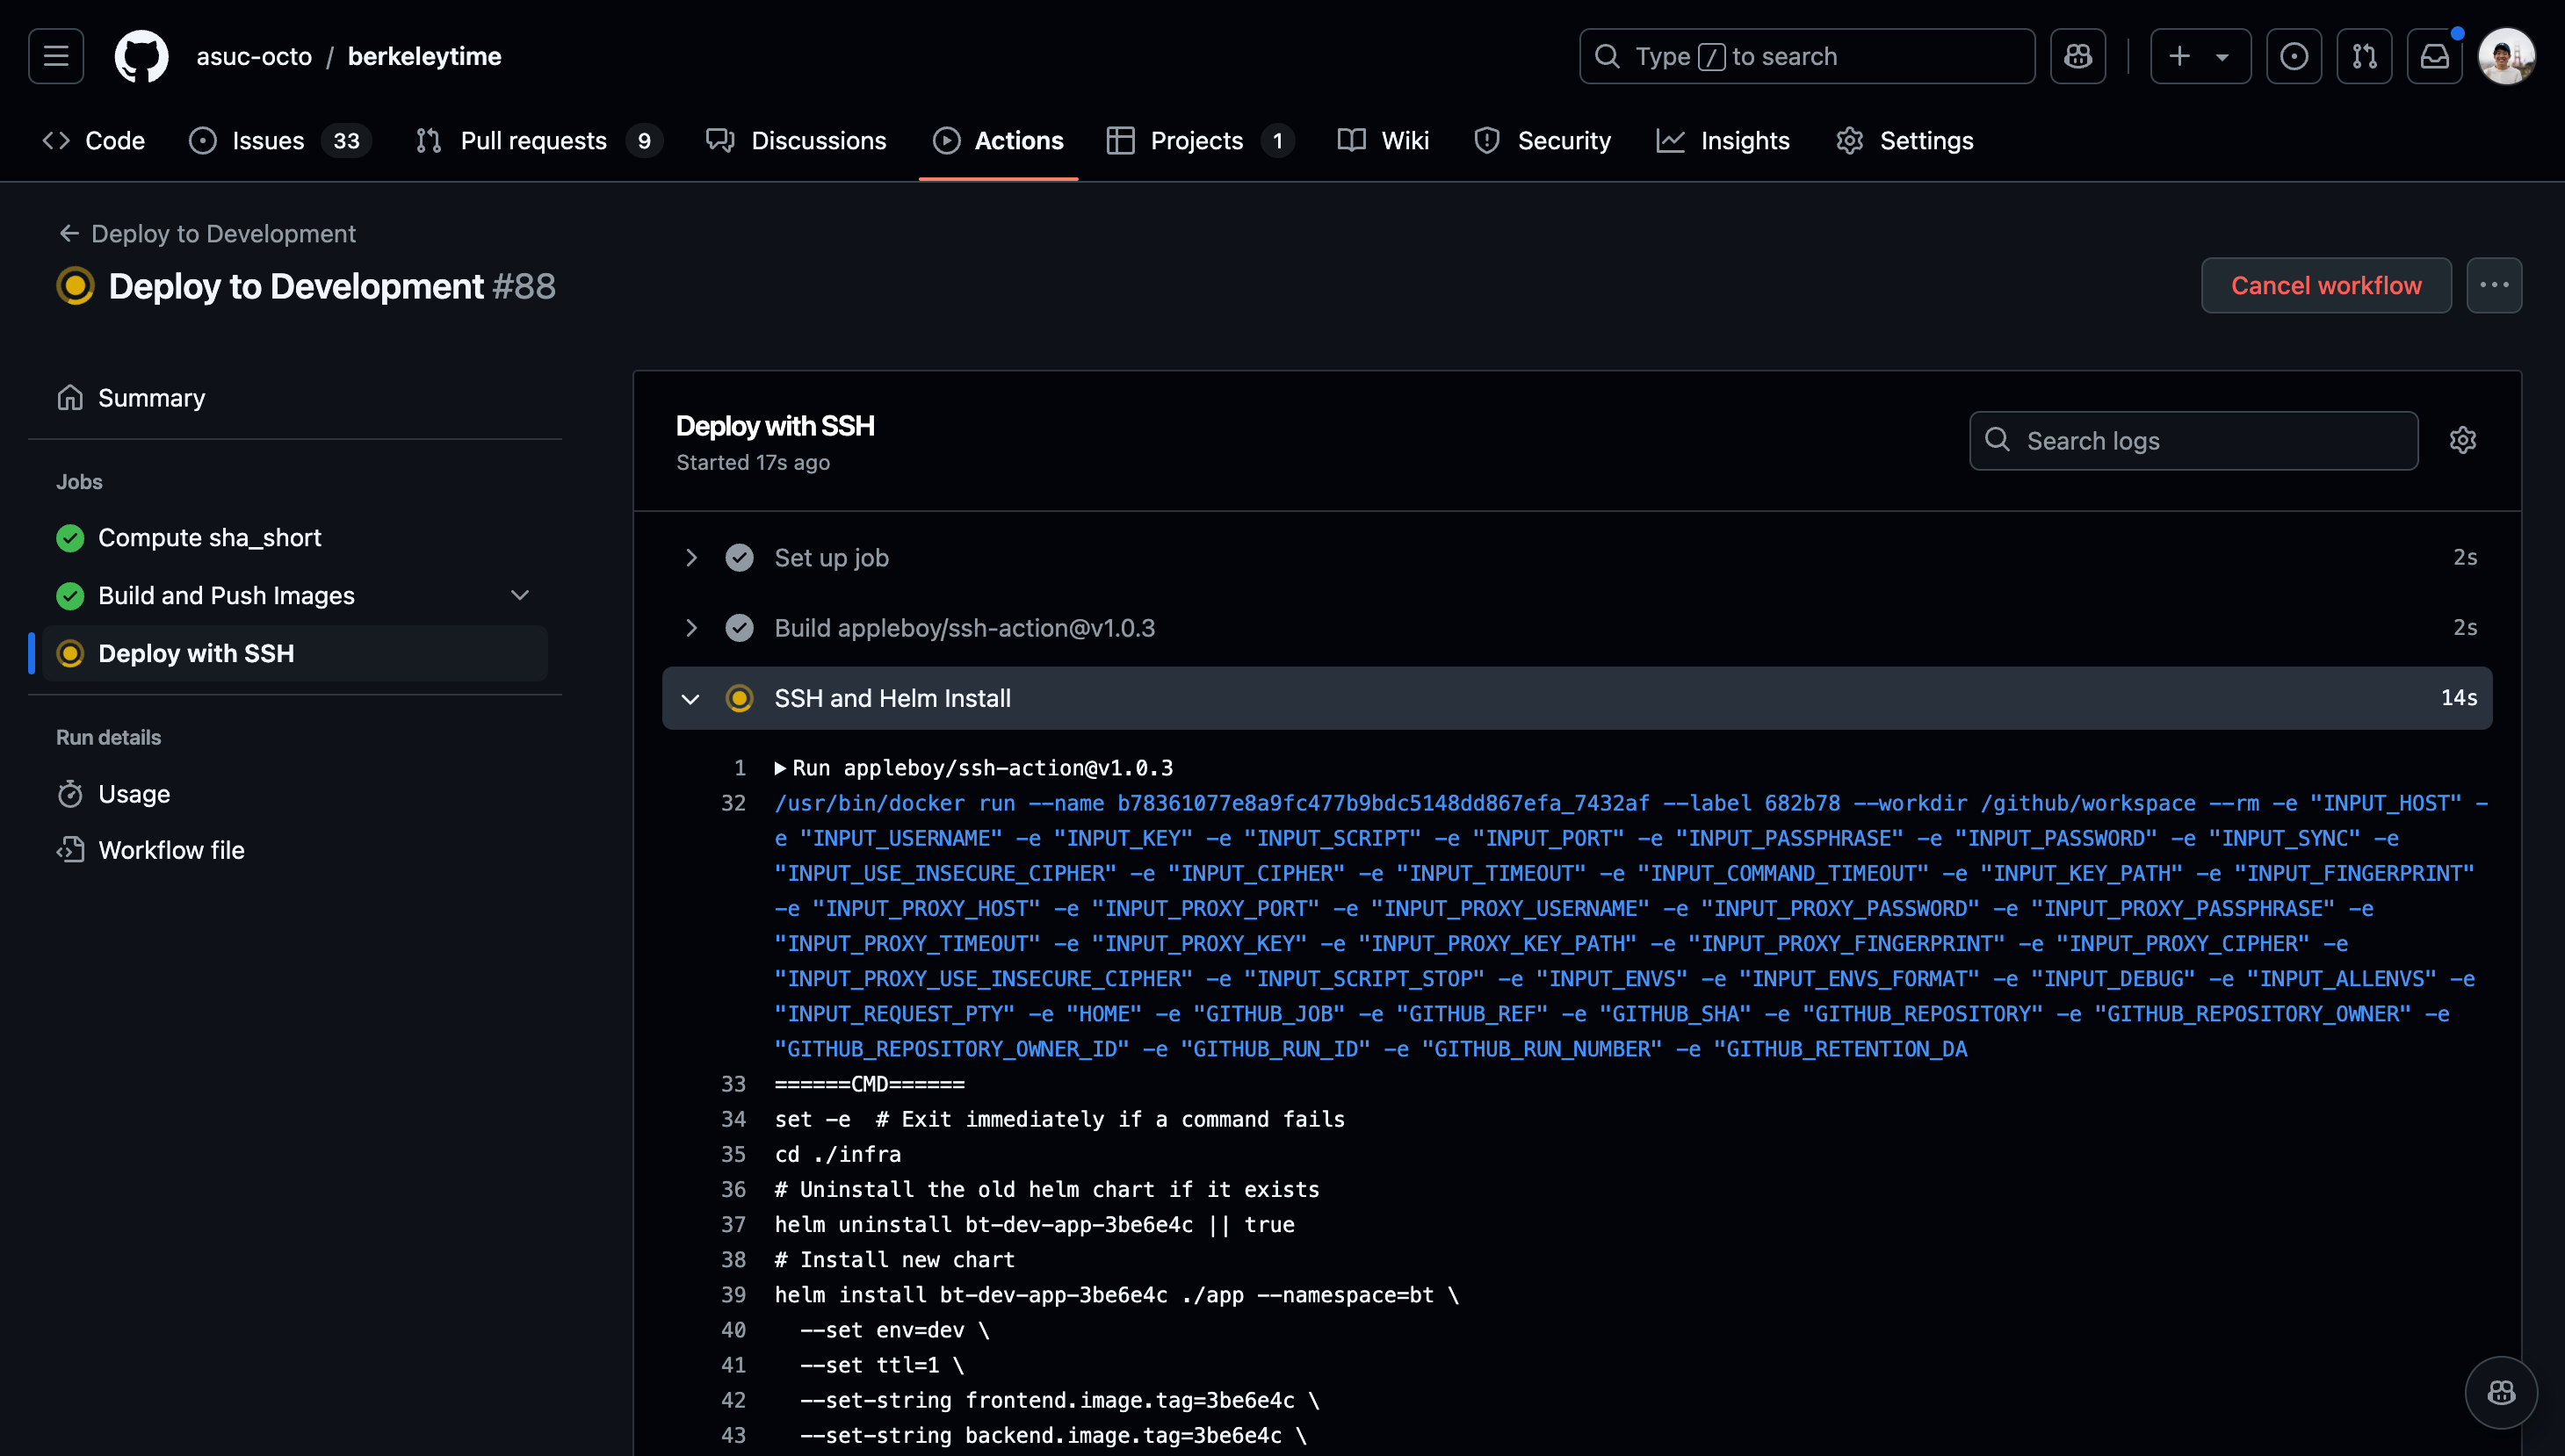
-
Once the action starts running, click into the action and watch the status of each step. If the deployment fails, the action will fail as well.
Images
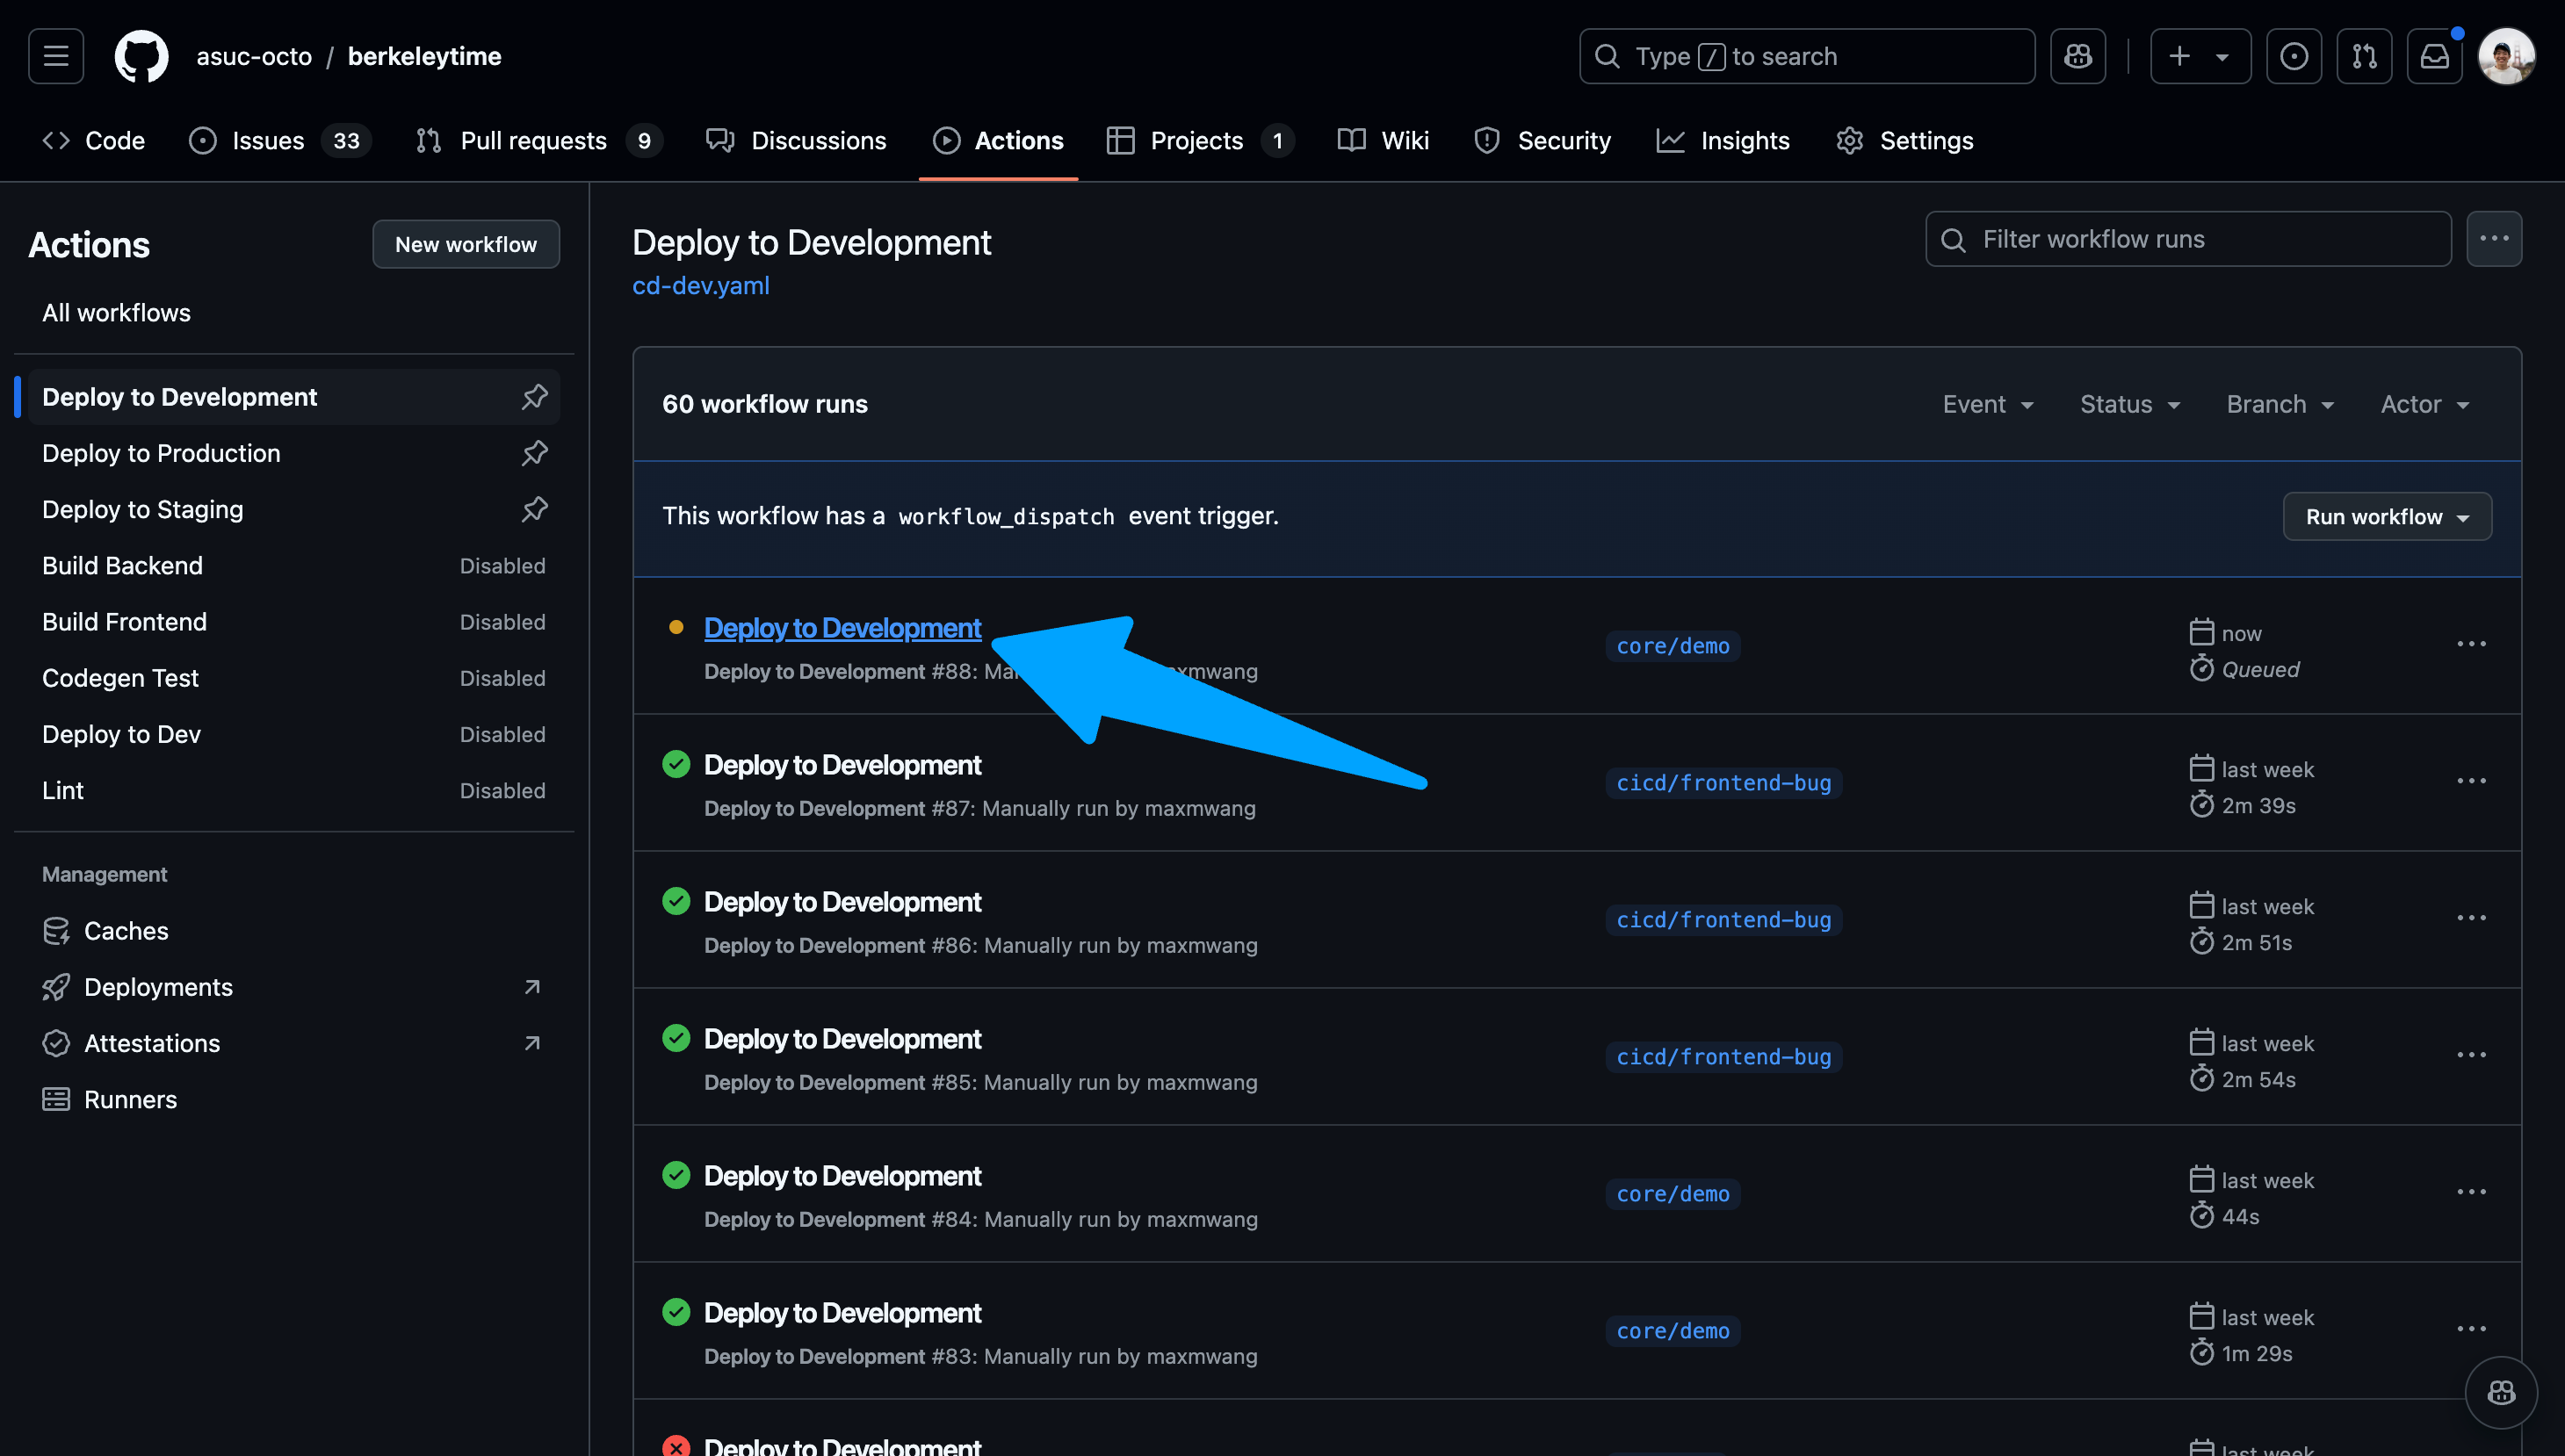 You can view the logs of each step by navigating the left sidebar.
-
After the action succeeds, go to
www.abcdefg.dev.stanfurdtime.com, whereabcdefgis the first 7 characters of the latest commit's hash. This is also shown on the summary tab of an action workflow. A hyperlink to the deployment is also available near the bottom of the Summary page of the workflow run.Example Success Deployment Log
======= CLI Version =======
Drone SSH version 1.8.0
===========================
Release "bt-dev-app-69d94b6" does not exist. Installing it now.
Pulled: registry-1.docker.io/octoberkeleytime/bt-app:0.1.0-dev.69d94b6
Digest: sha256:e3d020b8582b8b4c583f026f79e4ab2b374386ce67ea5ee43aa65c6b334f9db0
W1204 22:20:37.827877 2103423 warnings.go:70] unknown field "spec.template.app.kubernetes.io/instance"
W1204 22:20:37.827939 2103423 warnings.go:70] unknown field "spec.template.app.kubernetes.io/managed-by"
W1204 22:20:37.827947 2103423 warnings.go:70] unknown field "spec.template.app.kubernetes.io/name"
W1204 22:20:37.827952 2103423 warnings.go:70] unknown field "spec.template.env"
W1204 22:20:37.827956 2103423 warnings.go:70] unknown field "spec.template.helm.sh/chart"
NAME: bt-dev-app-69d94b6
LAST DEPLOYED: Wed Dec  4 22:20:36 2024
NAMESPACE: bt
STATUS: deployed
REVISION: 1
TEST SUITE: None
Waiting for deployment "bt-dev-app-69d94b6-backend" rollout to finish: 0 of 2 updated replicas are available...
Waiting for deployment "bt-dev-app-69d94b6-backend" rollout to finish: 1 of 2 updated replicas are available...
deployment "bt-dev-app-69d94b6-backend" successfully rolled out
deployment "bt-dev-app-69d94b6-frontend" successfully rolled out
===============================================
✅ Successfully executed commands to all hosts.
===============================================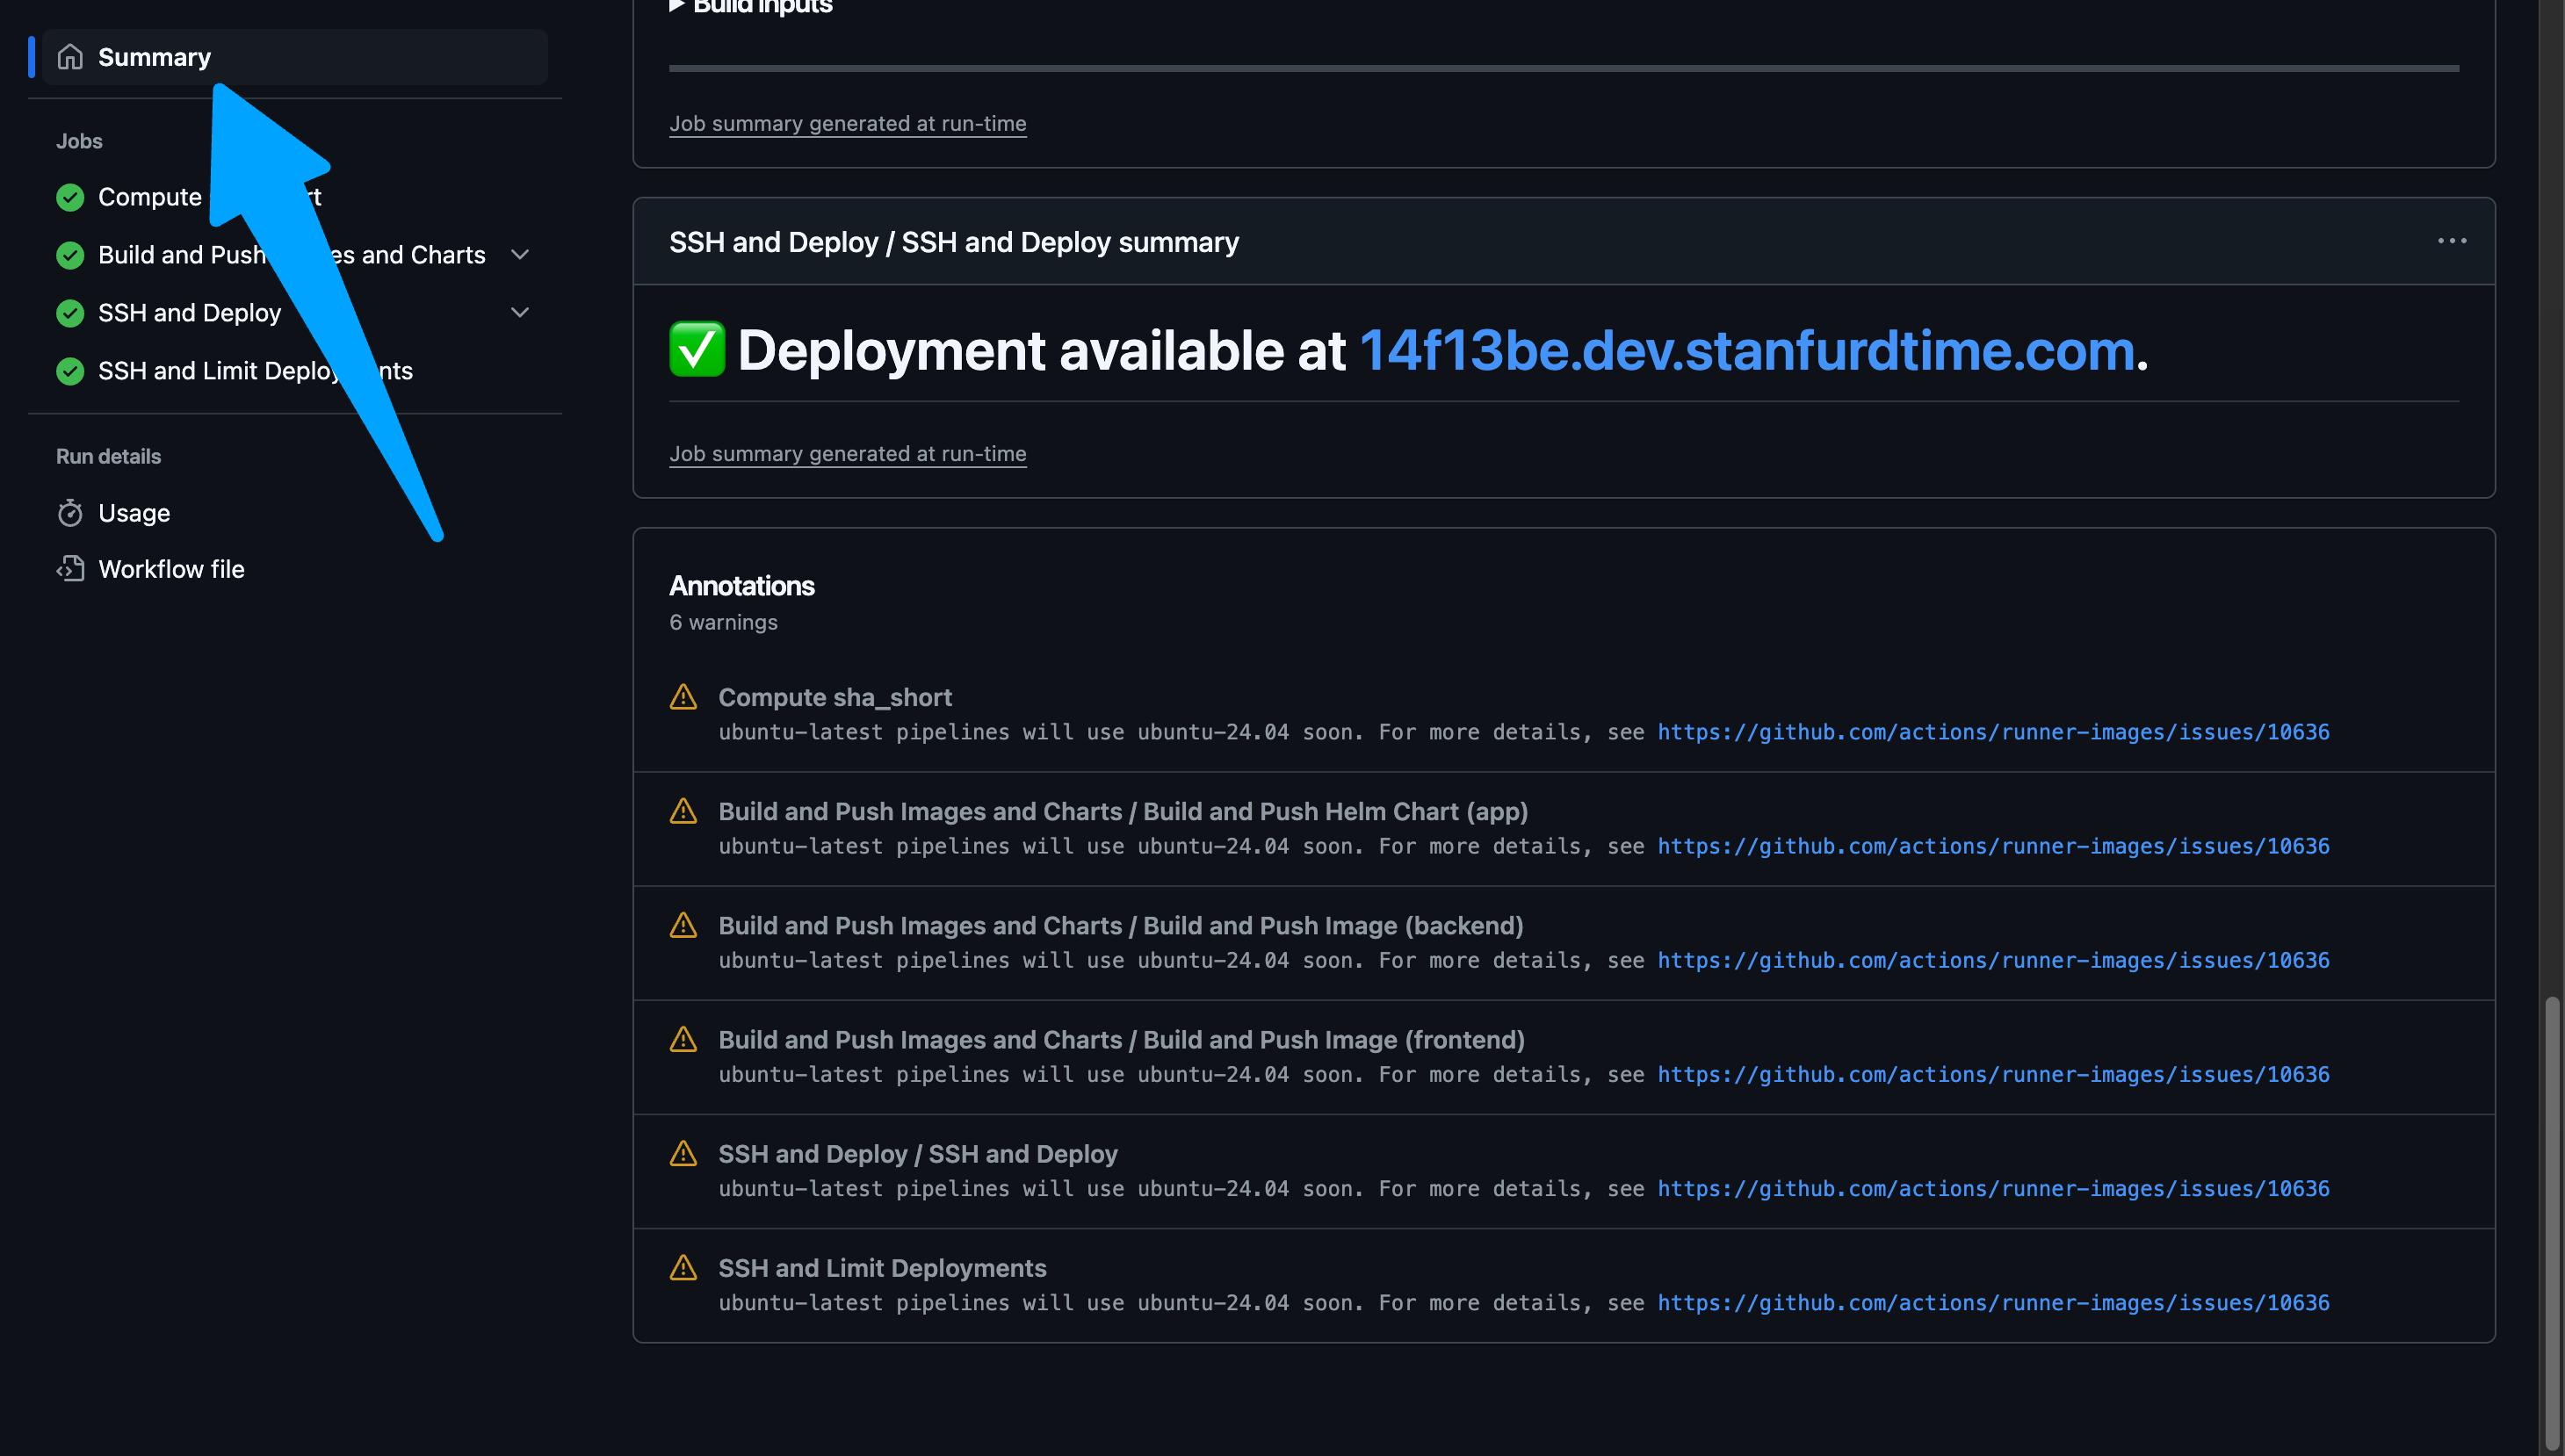
Staging
The staging CI/CD pipeline is automatically run on every push to master (currently gql). The staging website can be viewed at staging.stanfurdtime.com.
Production
The production CI/CD pipeline is manually run with a process similar to the development pipeline. However, the production pipeline can only be run on master and gql.
Backend
Welcome to the backend section.
What is the backend?
The backend application service is the user-facing API server responsible for serving data to the frontend. Communication between the backend and frontend is done with HTTPS, as do most websites on the modern internet. To see more on how the backend service interacts with other components in the Berkeleytime system, view the architecture page
The Berkeleytime Backend Service
The Tech Stack
The backend uses the following technologies:
- Programming Language: TypeScript
- Runtime Environment: NodeJS
- Web Server Framework: ExpressJS
- GraphQL Server1: Apollo Server
As opposed to a simpler REST API, Berkeleytime uses a GraphQL API design. This creates a more flexible backend API and allows the frontend to be more expressive with its requests.
Codebase Organization
The backend codebase has a simple folder layout, as described below.
.
├── src
│   └── bootstrap                       # Bootstrapping and loading of backend dependencies
│       └── index.ts                    # Bootstrapping/Loading entrypoint.
│   └── modules                         # Business logic of the app divided by domain.
│       └── index.ts                    # Modules entrypoint.
│   ├── utils                           # Collection of utility function
│   ├── config.ts                       # Handles environment variable loading
│   └── main.ts                         # Backend entrypoint
└── codegen.ts                          # GraphQL code generation configuration file
Here is a list of services bootstrapped by the files in src/bootstrap:
- Web Server Framework: ExpressJS
- GraphQL Server: Apollo Server
- Authentication: Passport
- MongoDB ORM: Mongoose
- Cache Connection: Redis
The bulk of the application logic is split into separate modules within the src/modules directory. A module contains a collection of files necessary to serve the GraphQL queries for its domain. The file structure of the modules are all very similar. Below is the user module as an example:
.
├── src
│   └── modules
│       └── user                        # User module (as an example)
│           └── generated-types         # Generated types from codegen
│               └── module-types.ts     # Relevant Typescript types of GraphQL type definitions
│           └── typedefs                # GraphQL type definitions
│               └── [schema].ts         # A type definition for a schema
│           ├── controller.ts           # Collection of DB-querying functions
│           ├── formatter.ts            # (Optional) Formats DB models to GraphQL type
│           ├── index.ts                # Entrypoint to the module
│           └── resolver.ts             # GraphQL resolver
Inside a Module

The above diagram shows a simplified request-to-response pipeline within a module.
-
A GraphQL request is sent to the backend server. A request looks like a JSON skeleton, containing only keys but no values. The request is "routed" to the specific module.1
-
The resolver handles the request by calling the specific controller method necessary.
- For more information on how the resolver should be designed, it is recommended to consult the Apollo Server documentation on resolvers.
-
The controller queries the Mongo database, using user input to filter documents.
- We use Mongoose as an abstraction layer between our application logic and MongoDB queries.2 Both Mongoose docs and MongoDB docs on queries are valuable resources.
-
The formatter translates the DB response from a database type, from
berkeleytime/packages/common/src/models, into a GraphQL type, from[module]/generated_types/module-types.ts.- Note that not all modules have a formatter because the database type and GraphQL type are sometimes identical.
-
Finally, the result is returned as a GraphQL response in the shape of a JSON, matching the query from step 1.3
In runtime, all of the modules and type definitions are merged into one by src/modules/index.ts, so there isn't any explicit "routing" in our application code.
The Mongoose abstraction is very similar to the built-in MongoDB query language.
Fields not requested are automatically removed.
Database Models
In addition to the API server, the backend service is responsible for managing MongoDB usage—specifically, how our data is organized and defined through collections, models, and indexes.
.
├── apps
│   └── backend                         # Backend codebase
├── packages                            # Shared packages across apps
│   └── common
│       └── src
│           └── models                  # All database models
│               └── [model].ts          # Example model file
A model file will contain TypeScript types mirroring the database model, a Mongoose model definition, and database index declarations.
// packages/common/src/models/term.ts

// defines TypeScript type for nested object
export interface ISessionItem { /* ... */ }

// defines TypeScript type for term object
export interface ITermItem { /* ... */ }

// defines Mongoose schema using TypeScript type
const termSchema = new Schema<ITermItem>({ /* ... */ });

// defines database indexes
termSchema.index( /* ... */ );

// creates Mongo model instance
export const TermModel: Model<ITermItem> = model<ITermItem>(
  "Term",
  termSchema
);
Testing the API
To test the GraphQL API, it is recommended to first seed the local database in order to have data.
API testing is mainly done through the Apollo GraphQL Sandbox available at http://localhost:8080/api/graphql when the backend container is running. While the UI is helpful for creating queries for you, it is highly recommended to review the GraphQL docs, specifically these pages:
Data
At its core, Berkeleytime serves as a data aggregation platform. We work directly with the Office of the Registrar and the Engineering and Integration Services department (EIS) to pull data from multiple sources and provide students with the most accurate experience possible. Because data involving students can contain personally-identifiable information (PII), we must ensure we follow any and all data storage and use guidelines imposed by the university.
Understanding the data sources Berkeleytime has access to is imperative for building streamlined services.
API Central
The EIS maintains many RESTful APIs that consolidate data from various other sources, and provides documentation in the form of Swagger OpenAPI v3 specifications for each API. API Central serves as a portal for requesting access to individual APIs, interactive documentation, and managing API usage. Berkeleytime only has access to and utilizes the APIs necessary for servicing students.
Accessing APIs
HTTP requests to APIs must be authenticated with a client identifier and secret key pair and are rate limited to minimize unauthorized access and preserve system health.
warning
Client identifiers and secret keys should be treated as sensitive information and should never be shared with third-parties.
TypeScript API clients and types are automatically generated from the specifications using swagger-typescript-api and are provided as a local package for Berkeleytime apps to access.
import { Class, ClassesAPI } from "@repo/sis-api/classes";

const classesAPI = new ClassesAPI();

classesAPI.v1.getClassesUsingGet(...);
Class API
The Class API provides data about classes, sections, and enrollment.
- Classes are offerings of a course in a specific term. There can be many classes for a given course, and even multiple classes for a given course in the same semester. Not all classes for the a course need to include the same content either. An example of a class would be COMPSCI 61A Lecture 001 offered in Spring 2024. Classes themselves do not have facilitators, locations, or times associated with them. Instead, they are most always associated with a primary section.
- Sections are associated with classes and are combinations of meetings, locations, and facilitators. There are many types of sections, such as lectures, labs, discussions, and seminars. Each class most always has a primary section and can have any number of secondary sections.
Students don't necessarily enroll only in classes, but also a combination of sections.
Course API
The Course API provides data about courses.
- Courses are subject offerings that satisfy specific requirements or include certain curriculum. An example of a course would be COMPSCI 61A. However, multiple COMPSCI 61A courses might exist historically changing requirements and curriculum requires new courses to be created and old courses to be deprecated. Only one course may be active for any given subject and number at a time.
Term API v2
The Term API v2 provides data about terms and sessions.
- Terms are time periods during which classes are offered. Terms at Berkeley typically fall under the Spring and Fall semesters, but Berkeley also offers a Summer term and previously offered a Winter term (in the 1900s). Terms are most always associated with at least one session.
- Sessions are more granular time periods within a semester during which groups of classes are offered. The Spring and Fall semesters at Berkeley consist only of a single session that spans the entire semester, but the Summer term consists of multiple sessions of varying lengths depending on the year.
CalAnswers
TODO
Datapuller
Welcome to the datapuller section.
What is the datapuller?
The datapuller is a modular collection of data-pulling scripts responsible for populating Berkeleytime's databases with course, class, section, grades, and enrollment data from the official university-provided APIs. This collection of pullers are unified through a singular entrypoint, making it incredibly easy for new pullers to be developed. The original proposal can be found here1.
Motivation
Before the datapuller, all data updates were done through a single script run everyday. The lack of modularity made it difficult to increase or decrease the frequency of specific data types. For example, enrollment data changes rapidly during enrollment season—it would be beneficial to be able to update our data more frequently than just once a day. However, course data seldom changes—it would be efficient to update our data less frequently.
Thus, datapuller was born, modularizing each puller into a separate script and giving us more control and increasing the fault-tolerance of each script.
Modifications to the initial proposal are not included in the document. However, the motivation remains relatively consistent.
Local & Remote Development
Local Development
The datapuller inserts data into the Mongo database. Thus, to test locally, a Mongo instance must first be running locally and be accessible to the datapuller container. To run a specific puller, the datapuller must first be built, then the specific puller must be passed as a command1. After modifying any code, the container must be re-built for changes to be reflected.
# ./berkeleytime

# Start up docker-compose.yml
docker compose up -d

# Build the datapuller-dev image
docker build --target datapuller-dev --tag "datapuller-dev" .

# Run the desired puller. The default puller is main.
docker run --volume ./.env:/datapuller/apps/datapuller/.env --network bt \
    "datapuller-dev" "--puller=courses"
The valid pullers are:
coursessections-activesections-last-five-yearsclasses-activeclasses-last-five-yearsgrades-recentgrades-last-five-yearsenrollmentsterms-allterms-nearby
tip
If you do not need any other services (backend, frontend), then you can run a Mongo instance independently from the docker-compose.yml configuration. However, the below commands do not allow data persistence.
# Run a Mongo instance. The name flag changes the MONGO_URI.
# Here, it would be mongodb://mongodb:27017/bt?replicaSet=rs0.
docker run --name mongodb --network bt --detach "mongo:7.0.5" \
    mongod --replSet rs0 --bind_ip_all

# Initiate the replica set.
docker exec mongodb mongosh --eval \
    "rs.initiate({_id: 'rs0', members: [{_id: 0, host: 'mongodb:27017'}]})"
Here, I reference the Docker world's terminology. In the Docker world, the ENTRYPOINT instruction denotes the the executable that cannot be overriden after the image is built. The CMD instruction denotes an argument that can be overriden after the image is built. In the Kubernetes world, the ENTRYPOINT analogous is the command field, while the CMD equivalent is the args field.
Remote Development
The development CI/CD pipeline marks all datapuller CronJobs as suspended, preventing the datapuller jobs to be scheduled. To test a change, manually run the desired puller.
Frontend
We maintain a static, single-page application (SPA) at berkeleytime.com. Once compiled, the application consists only of HTML, JavaScript, and CSS files served to visitors. No server generates responses at request time. Instead, the SPA utilizes the browser to fetch data from the backend service hosted at berkeleytime.com/api/graphql.
We originally chose this pattern because most developers are familiar with React, Vue, Svelte, or other SPA frameworks and we did not want to opt for a more opinionated meta-framework like Next.js or Remix for now. However, there are always trade-offs.
The frontend consists of the design, components, and logic that make up our SPA.
Recommendations
Stack
Berkeleytime is built entirely with TypeScript and the frontend follows suit with strictly-typed React built with Vite. Because we use Apollo for our GraphQL server, use the React Apollo client for fetching and mutating data on the frontend.
import { QueryHookOptions, useQuery } from "@apollo/client";

import { READ_CLASS, ReadClassResponse, Semester } from "@/lib/api";

export const useReadClass = (
  year: number,
  semester: Semester,
  subject: string,
  courseNumber: string,
  number: string,
  options?: Omit<QueryHookOptions<ReadClassResponse>, "variables">
) => {
  const query = useQuery<ReadClassResponse>(READ_CLASS, {
    ...options,
    variables: {
      year,
      semester,
      subject,
      courseNumber,
      number,
    },
  });

  return {
    ...query,
    data: query.data?.class,
  };
};
Structure
The frontend consists of not only the SPA, but also various packages used to modularize our codebase and separate concerns. These packages are managed by Turborepo, a build system designed for scaling monorepos, but I won't dive too deep into how Turborepo works right now.
apps/
  ...
  frontend/                     # React SPA served at https://berkeleytime.com
  ...
packages/
  ...
  theme/                        # React design system
  eslint-config/                # Shared utility package for ESLint configuration files
  typescript-config/            # Shared utility package for TypeScript configured files
  ...
You can see how the frontend app depends on these packages within the apps/frontend/package.json.
{
  "name": "frontend",
  // ...
  "dependencies": {
    // ...
    "@repo/theme": "*",
    "react": "^19.0.0"
  },
  "devDependencies": {
    // ...
    "@repo/eslint-config": "*",
    "@repo/typescript-config": "*",
    "@types/react": "^19.0.8",
    "@vitejs/plugin-react": "^4.3.4",
    "eslint": "^9.19.0",
    "typescript": "^5.7.3",
    "vite": "6.0.8"
  }
}
Design system
We maintain a design system built on top of Radix primitives, a library of unstyled, accessible, pre-built React components like dialogs, dropdown menus, and tooltips. By standardizing components, colors, icons, and other patterns, we can reduce the amount of effort required to build new features or maintain consistency across the frontend.
The design system houses standalone components that do not require any external context. They maintain design consistency and should function whether or not they are used in the context of Berkeleytime. More complex components specific to Berkeleytime, such as for classes or courses, live in the frontend app and will be discussed later.
We use Iconoir icons and the Inter typeface family. These design decisions, and reusable design tokens, are all abstracted away within the theme package and the ThemeProvider React component.
# packages/theme/src
...
components/                          # React components for the design system
  ...
  ThemeProvider/                     # Entry point component
  Button/
  Dialog/
  Tooltip/
  ...
contexts/                            # React contexts for the design system
hooks/                               # React hooks for the design system
...
We built our design system with light and dark themes in mind, and the color tokens will respond accordingly. When building interfaces within Berkeleytime, standard color tokens should be used to ensure consistency depending on the selected theme.
// packages/theme/components/ThemeProvider/ThemeProvider.module.scss

@mixin light-theme {
  --foreground-color: var(--light-foreground-color);
  --background-color: var(--light-background-color);
  --backdrop-color: var(--light-backdrop-color);

  // ...
}

@mixin dark-theme {
  --foreground-color: var(--dark-foreground-color);
  --background-color: var(--dark-background-color);
  --backdrop-color: var(--dark-backdrop-color);

  // ...
}

body[data-theme="dark"] {
  @include dark-theme;
}

body[data-theme="light"] {
  @include light-theme;
}

body:not([data-theme]) {
  @include light-theme;

  @media (prefers-color-scheme: dark) {
    @include dark-theme;
  }
}
Application
I'm sure you've seen a Vite, React, and TypeScript app in the wild before, and we tend to follow most common practices, which includes using React Router.
#
src/
  app/                    # Views, pages, and scoped components
  components/             # Reusable components built around Berkeleytime
  contexts/               # React contexts
  hooks/                  # React hooks
  lib/                    # Utility functions and general logic
    api/                  # GraphQL types and queries
    ...
  main.tsx
  App.tsx                 # Routing and React entry point
  index.html
  ...
  vite.config.ts
Conventions
We use SCSS modules for scoping styles to components and reducing global CSS clutter. A typical folder (in src/app or src/components) should be structured like so.
# apps/frontend
src/app/[COMPONENT]/
  index.tsx
  [COMPONENT].module.scss
  ...
  [CHILD_COMPONENT]/
    index.tsx
    [CHILD_COMPONENT].module.scss
Child components should be used in your best judgment whenever significant logic must be refactored out of the component for structural or organizational purposes. If child components are reused in multiple pages or components, they should be moved as high up in the file structure as is required or moved to src/components.
Infrastructure
Welcome to the infrastructure section.
note
Infrastructure concepts tend to be more complex than application concepts. Don't be discouraged if a large amount of content in the infrastructure section is confusing!
What is Infrastructure?

Software infrastructure refers to the services and tools that create an underlying layer of abstractions that the application is developed on. Compared to the application layer, infrastructure is significantly more broad in its responsibilities, although these responsibilities are more common in software development.
important
We aim to use a small set of existing infrastructure solutions with large communities. This philosophy reduces the cognitive load on each developer and simplifies the onboarding process, both of which are valuable for creating long-lasting software in a team where developers are typically cycled out after only ~4 years.
Onboarding
Architecture
Berkeleytime uses a fairly simple microservices architecture—we decouple only a few application components into separate services. Below is a high-level diagram of the current architecture (switch to a light viewing mode to see arrows).

Note that, other than the application services developed by us, all other services are well-known and have large communities. These services have many tutorials, guides, and issues already created online, streamlining the setup and debugging processes.
An HTTP Request's Life
To better understand the roles of each component in the Berkeleytime architecture, we describe the lifecycle of an HTTP request from a user's action.
-
An HTTP request starts from a user's browser. For example, when a user visits
https://berkeleytime.com, aGETrequest is sent tohozer-51.1 -
Once the request reaches
hozer-51, it is first encountered byhozer-51's Kubernetes cluster load balancer, a MetalLB instance, which balances external traffic into the cluster across nodes.2 -
Next, the request reaches the reverse proxy, an nginx instance, which forwards HTTP requests to either a backend or frontend service based on the URL of the request
- Requests with URLs matching
https://berkeleytime.com/api/*are forwarded to the backend service. - All other requests are forwarded to the frontend service.
The nginx instance is also responsible for load balancing between the backend/frontend replicas. Currently, there are two of each in all deployment environments.
- Requests with URLs matching
-
The request is processed by one of the services.
- The backend service may interact with the MongoDB database or the Redis cache while processing the request.3
-
Finally, an HTTP response is sent back through the system to the user's machine.
More specifically, the user's machine first requests a DNS record of berkeleytime.com from a DNS server, which should return hozer-51's IP address. After the user's machine knows the hozer-51 IP address, the GET request is sent.
Currently, we only have one node: hozer-51.
Requests sent from the backend to the database or cache are not necessarily HTTP requests.
SSH Setup
warning
This onboarding step is not necessary for local development. As running commands in hozer-51 can break production, please continue with caution.
The Berkeleytime website is hosted on a machine supplied by the OCF. This machine will be referenced as hozer-51 in these docs. SSH allows us to connect to hozer-51 with a shell terminal, allowing us to infra-related tasks.
This guide assumes basic experience with SSH.
-
Please ensure your public SSH key has an identifying comment attached, such as your Berkeley email:
ssh-ed25519 AAAAC3NzaC1lZDI1NTE5AAq8Lwls394thisIsNotARealKey ga@github.comYou can directly modify your public key file at
~/.ssh/id_*.pub, or you can use the following command:ssh-keygen -c -C "someone@berkeley.edu" -f ~/.ssh/id_*Note that
-ftakes in the path to your private key file, but only modifies the public key file. -
Copy your SSH key to the
hozermachine'sauthorized_keysfile:ssh-copy-id root@hozer-51.ocf.berkeley.eduThe SSH password can be found in the pinned messages of the #backend staff channel in discord.
-
(Optional) Add
hozer-51to your~/.ssh/configfile:# Begin Berkeleytime hozer config Host hozer-?? HostName %h.ocf.berkeley.edu User root # End Berkeleytime hozer configNow, you can quickly SSH into the remote machine from your terminal:
ssh hozer-51
# as opposed to root@hozer-51.ocf.berkeley.edu
Kubernetes & Helm
Kubernetes is a container orchestrator that serves as the foundation of our infrastructure. It provides a simple deployment interface. To get started with Kubernetes, here are a few resources:
- The concepts page is a good place to start.
- The glossary is also a good place to glance over common jargon.
Helm is a package manager for Kubernetes that provides an abstraction over the Kubernetes interface for deploying groups of components called "charts". In addition, it allows us to install pre-made charts, useful for deploying services that we don't develop.
Useful Commands
This is an uncomprehensive list of commands that can be executed in hozer-51, useful for debugging.
tip
On hozer-51, k is an alias for kubectl and h is an alias for helm.
important
The default namespace has been set as bt.
Pods
-
k get podsView all running pods.
-
k get pods -l env=[dev|stage|prod]View all running pods in a specified environment.
-
k logs [pod name]View logs of a pod. You can get a pod's name with
k get pods. Include a-fflag to follow logs, which will stream logs into your terminal. -
k describe pod [pod name]View a description of a pod. Useful for when pod is failing to startup, thus not showing any logs.
-
k exec -it [pod name] -- [command]Execute a command inside a pod. The command can be
bash, which will start a shell inside the pod and allow for more commands.
Deployments
-
k get deployView all running deployments.
-
k get deploy -l env=[dev|stage|prod]View all running deployments in a specified environment.
-
k describe deploy [deploy name]View a description of a deploy. Useful for when the deploy's pods are failing to startup, thus not showing any logs.
-
k rollout restart deploy/[deploy name]Manually restart a deployment.
Helm Charts
-
h listList helm chart releases. A release is an installed instance of a chart.
CI/CD Workflow
We use GitHub actions to build our CI/CD workflows.1 All three CI/CD workflows2 are fairly similar to each other and can all be broken into two phases: the build and the deploy phase.
-
Build Phase: An application container and Helm chart are built and pushed to a registry. We use Docker Hub. This process is what
.github/workflows/cd-build.yamlis responsible for. -
Deploy Phase: After the container and Helm chart are built and pushed to a registry, they are pulled and deployed onto
hozer-51. This process is what.github/workflows/cd-deploy.yamlis responsible for.
Comparing Development, Staging, and Production Environments
The differences between the three environments are managed by each individual workflow file: cd-dev.yaml, cd-stage.yaml, and cd-prod.yaml.
| Development | Staging | Production | |
|---|---|---|---|
| k8s Pod Prefix | bt-dev-* | bt-stage-* | bt-prod-* |
| Container Tags | [commit hash] | latest | prod |
| Helm Chart Versions3 | 0.1.0-dev-[commit hash] | 0.1.0-stage | 1.0.0 |
| TTL (Time to Live) | [GitHub Action input] | N/A | N/A |
| Deployment Count Limit | 8 | 1 | 1 |
Datapuller suspend | true | false | false |
In the past, we have used a self-hosted GitLab instance. However, the CI/CD pipeline was obscured behind a admin login page. Hopefully, with GitHub actions, the deployment process will be more transparent and accessible to all engineers. Please don't break anything though!
Development, Staging, and Production
Ideally, these would follow semantic versioning, but this is rather difficult to enforce and automate.
Runbooks
- Manually run
datapuller - Previewing Infra Changes with
/helm-diffbefore deployment - Uninstall ALL development helm releases
- Force uninstall ALL helm charts in "uninstalling" state
- New sealed secret deployment
- Kubernetes Cluster Initialization
Manually run datapuller
-
First, list all cronjob instances:
k get cronjob -
Then, create a job from the specific cronjob:
k create job --from cronjob/[cronjob name] [job name]For example:
k create job --from cronjob/bt-prod-datapuller-courses bt-prod-datapuller-courses-manual-01
Previewing Infra Changes with /helm-diff before deployment
The /helm-diff command can be used in pull request comments to preview Helm changes before they are deployed. This is particularly useful when:
- Making changes to Helm chart values in
infra/apporinfra/base - Upgrading Helm chart versions or dependencies
- Modifying Kubernetes resource configurations
To use it:
- Comment
/helm-diffon any pull request - The workflow will generate a diff showing:
- Changes to both app and base charts
- Resource modifications (deployments, services, etc.)
- Configuration updates
The diff output is formatted as collapsible sections for each resource, with a raw diff available at the bottom for debugging.
Uninstall ALL development helm releases
h list --short | grep "^bt-dev-app" | xargs -L1 h uninstall
Development deployments are limited by CI/CD. However, if for some reason the limit is bypassed, this is a quick command to uninstall all helm releases starting with bt-dev-app.
Force uninstall ALL helm charts in "uninstalling" state
helm list --all-namespaces --all | grep 'uninstalling' | awk '{print $1}' | xargs -I {} helm delete --no-hooks {}
Sometimes, releases will be stuck in an uninstalling state. This command quickly force uninstalls all such stuck helm releases.
New sealed secret deployment
-
SSH into
hozer-51. -
Create a new secret manifest with the key-value pairs and save into
my_secret.yaml:k create secret generic my_secret -n bt --dry-run=client --output=yaml \ --from-literal=key1=value1 \ --from-literal=key2=value2 > my_secret.yaml -
Create a sealed secret from the previously created manifest:
kubeseal --controller-name bt-sealed-secrets --controller-namespace bt \
    --secret-file my_secret.yaml --sealed-secret-file my_sealed_secret.yaml
If the name of the secret might change across installations, add
--scope=namespace-wideto thekubesealcommand. For example,bt-dev-secretandbt-prod-secretare different names. Deployment without--scope=namespace-widewill cause ano key could decrypt secreterror. More details on the kubeseal documentation. -
The newly create sealed secret encrypts the key-value pairs, allowing it to be safely pushed to GitHub.
Steps 2 and 3 are derived from the sealed-secrets docs.
Kubernetes Cluster Initialization
On (extremely) rare occasions, the cluster will fail. To recreate the cluster, follow the instructions below (note that these may be incomplete, as the necessary repair varies):
-
Install necessary dependencies. Note that you may not need to install all dependencies. Our choice of Container Runtime Interface (CRI) is
containerdwithrunc. You will probably not need to configure the cgroup driver (our choice issystemd), but if so, make sure to set it in both thekubeletandcontainerdconfigs. -
Install Cilium, our choice of Container Network Interface (CNI). Note that you may not need to install the
ciliumCLI tool. -
Follow the commands in
infra/init.shone-by-one, ensuring each deployment succeeds, up until thebt-baseinstallation. -
Because the
sealed-secretsinstance has been redeployed, everySealedSecretmanifest must be recreated usingkubesealand the newsealed-secretsinstance. Look at the sealed secret deployment runbook. -
Now, each remaining service can be deployed. Note that MongoDB and Redis must be deployed before the backend service, otherwise the backend service will crash. Feel free to use the CI/CD pipeline to deploy the application services.